
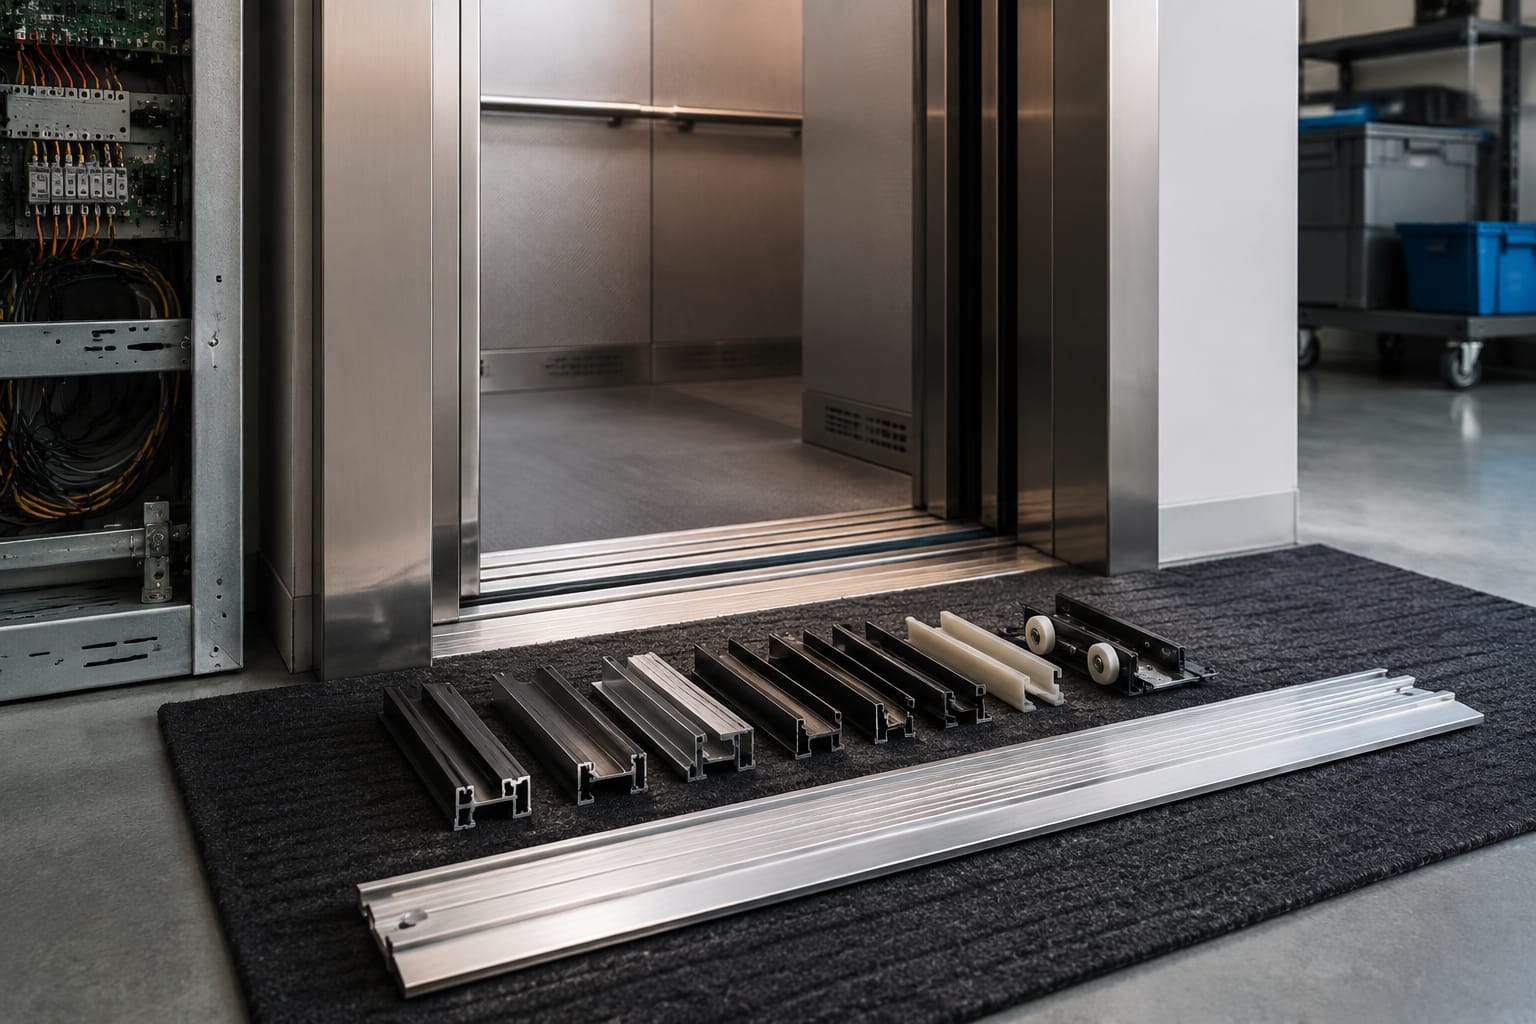
An elevator door sill is the grooved track at the doorway threshold that keeps the door panel moving on a controlled path. It is a small component with a major effect on door reliability: debris in its grooves, worn guide surfaces, loose fixings, or a mismatched profile can lead to scraping, vibration, poor closing and recurring door faults.
For maintenance teams in the Philippines, sill condition should be checked alongside door rollers, bottom guides and panel alignment. Replacing a sill is not simply a matter of matching its visible width. The groove arrangement, overall profile, fixing-hole positions, door-guide engagement and level difference at the threshold all need to suit the existing installation.
What an elevator door sill does
The elevator door sill forms the lower guide track for a door system. Its channels accept the door panel's bottom guide shoes or gibs, limiting side-to-side movement while the panel opens and closes. At a landing entrance, the sill also creates the threshold transition between the building floor and hoistway doors.
A sound elevator door sill helps the door system to:
- Keep door panels aligned during travel.
- Reduce panel sway and contact between adjoining door edges.
- Support consistent door closing and reopening behaviour.
- Maintain an accessible, reasonably even threshold at the entrance.
- Direct normal foot traffic across the doorway without exposing moving door components.
The sill is not normally the part that carries the full weight of a sliding door panel. That duty is generally handled by the overhead hanger and roller assembly. However, an incorrectly aligned, clogged or damaged sill can still place abnormal loads on bottom guides and contribute to roller, hanger or panel-edge wear.
Because sills sit at floor level, they collect dust, grit, spilled liquids and small objects. In busy sites such as residential buildings, hospitals, malls, hotels and industrial facilities, routine cleaning is as important as periodic mechanical inspection.
Car sills versus landing sills
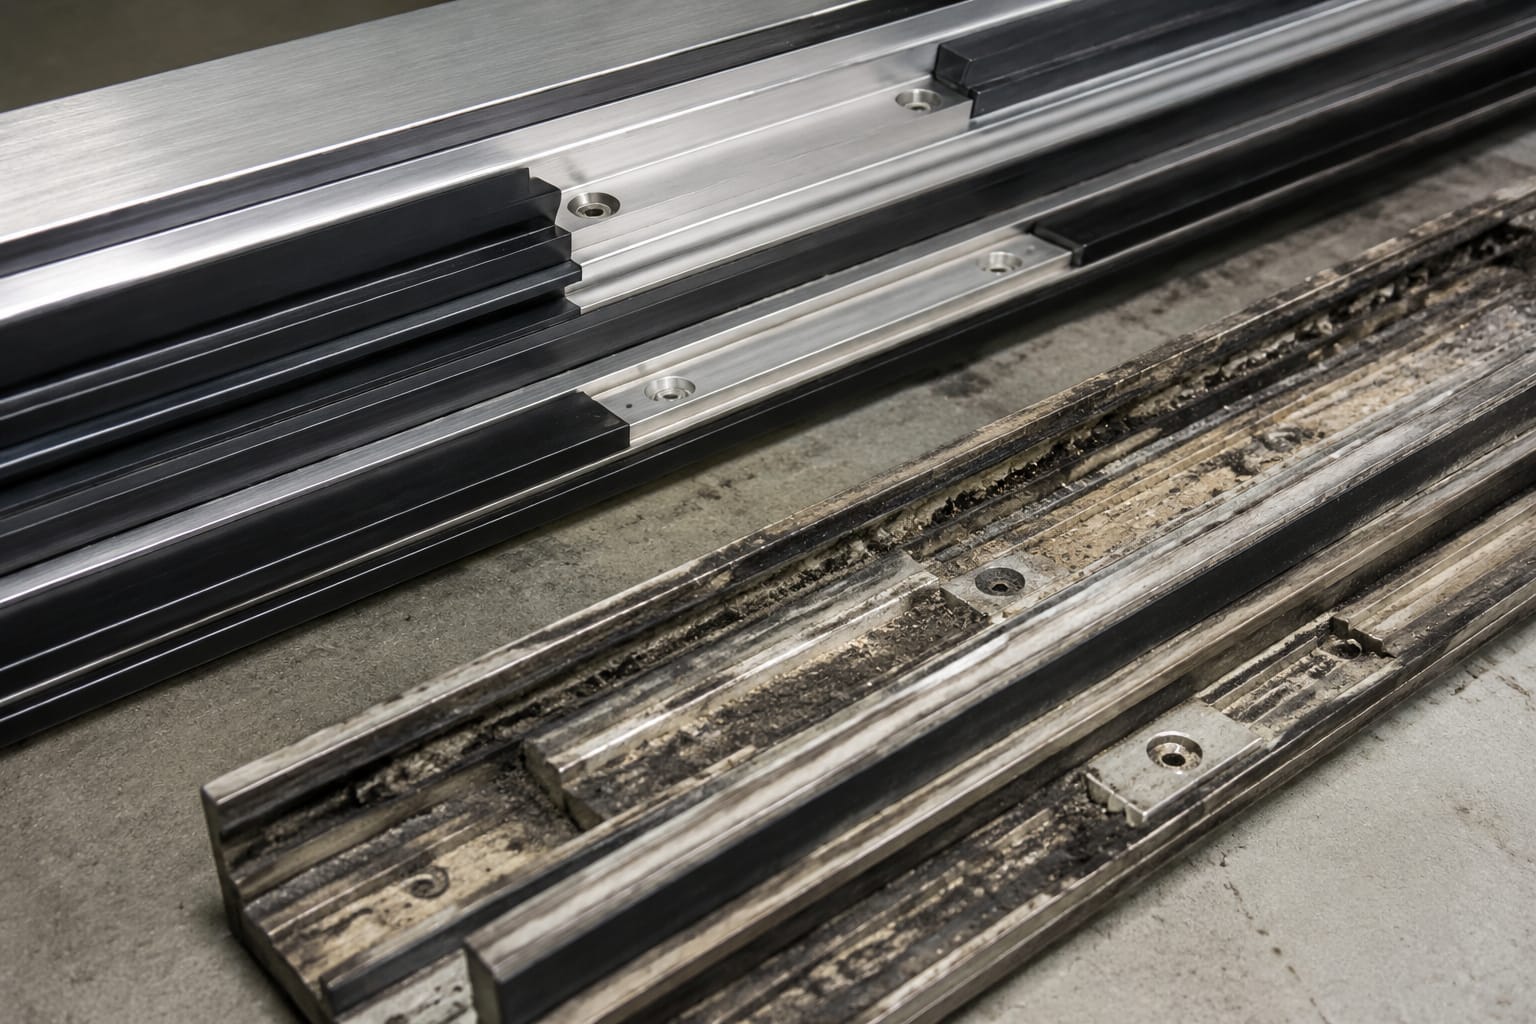
Car and landing sills serve related functions, but they operate in different environments and are not automatically interchangeable.
| Feature | Car sill | Landing sill |
|---|---|---|
| Location | At the entrance of the lift car | At each floor entrance |
| Main role | Guides car door panel bottom guides | Guides landing door panel bottom guides |
| Movement | Travels with the car | Fixed to the building landing |
| Exposure | Subject to passenger traffic inside the car and vibration during travel | Subject to corridor traffic, cleaning water and debris from the building side |
| Replacement consideration | Must fit the car-door arrangement and car entrance construction | Must fit the landing-door arrangement, floor finish and entrance frame |
A centre-opening door may have a sill profile with channels arranged to guide two panels moving away from the centre. A side-opening arrangement may use a different groove layout because its panels travel in one direction. Multi-panel and telescopic door systems can require additional tracks or a more complex profile.
The nominal opening width alone does not determine compatibility. Door handing, the number of panels, panel guide position, threshold construction and the manufacturer-specific profile all matter. During a modernisation, the existing sill may also need review if new door panels, guides or hangers have different geometry.
Common sill materials and profiles
Aluminium alloy is widely used for elevator door sills because it is relatively light, corrosion-resistant and can be extruded into precise grooved profiles. Other materials may be found in particular applications, but the correct choice depends on the original door system, traffic conditions and the specification of the complete entrance.
Aluminium alloy sills
Aluminium alloy sill sections are common on passenger lifts and many commercial installations. They can provide well-defined guide channels while resisting ordinary indoor corrosion. Their performance depends heavily on the condition of the grooves and the quality of installation.
An aluminium sill can be damaged by repeated impacts from wheeled loads, aggressive scraping during cleaning, loose guide shoes or hard debris dragged through the channels. Deep gouges and flattened guide surfaces may eventually affect panel tracking.
For a replacement example, an aluminium alloy 60 mm F-type elevator door sill should be assessed by its actual drawing, profile and fixing arrangement, not by the “60 mm” reference alone. Confirm the intended door configuration and all dimensional details before ordering.
Stainless steel and protected threshold finishes
Some entrances incorporate stainless steel or other protective finishes where appearance, surface durability or building design calls for them. A visible metal cover does not necessarily identify the complete guide profile underneath. Inspect the full sill construction before deciding whether a surface repair is possible.
Different metals in contact can also need consideration in damp or chemically cleaned areas. Cleaning products, trapped moisture and poor drainage can accelerate staining or corrosion around fasteners and adjacent construction, even where the sill material itself is corrosion-resistant.
Groove profiles and track arrangements
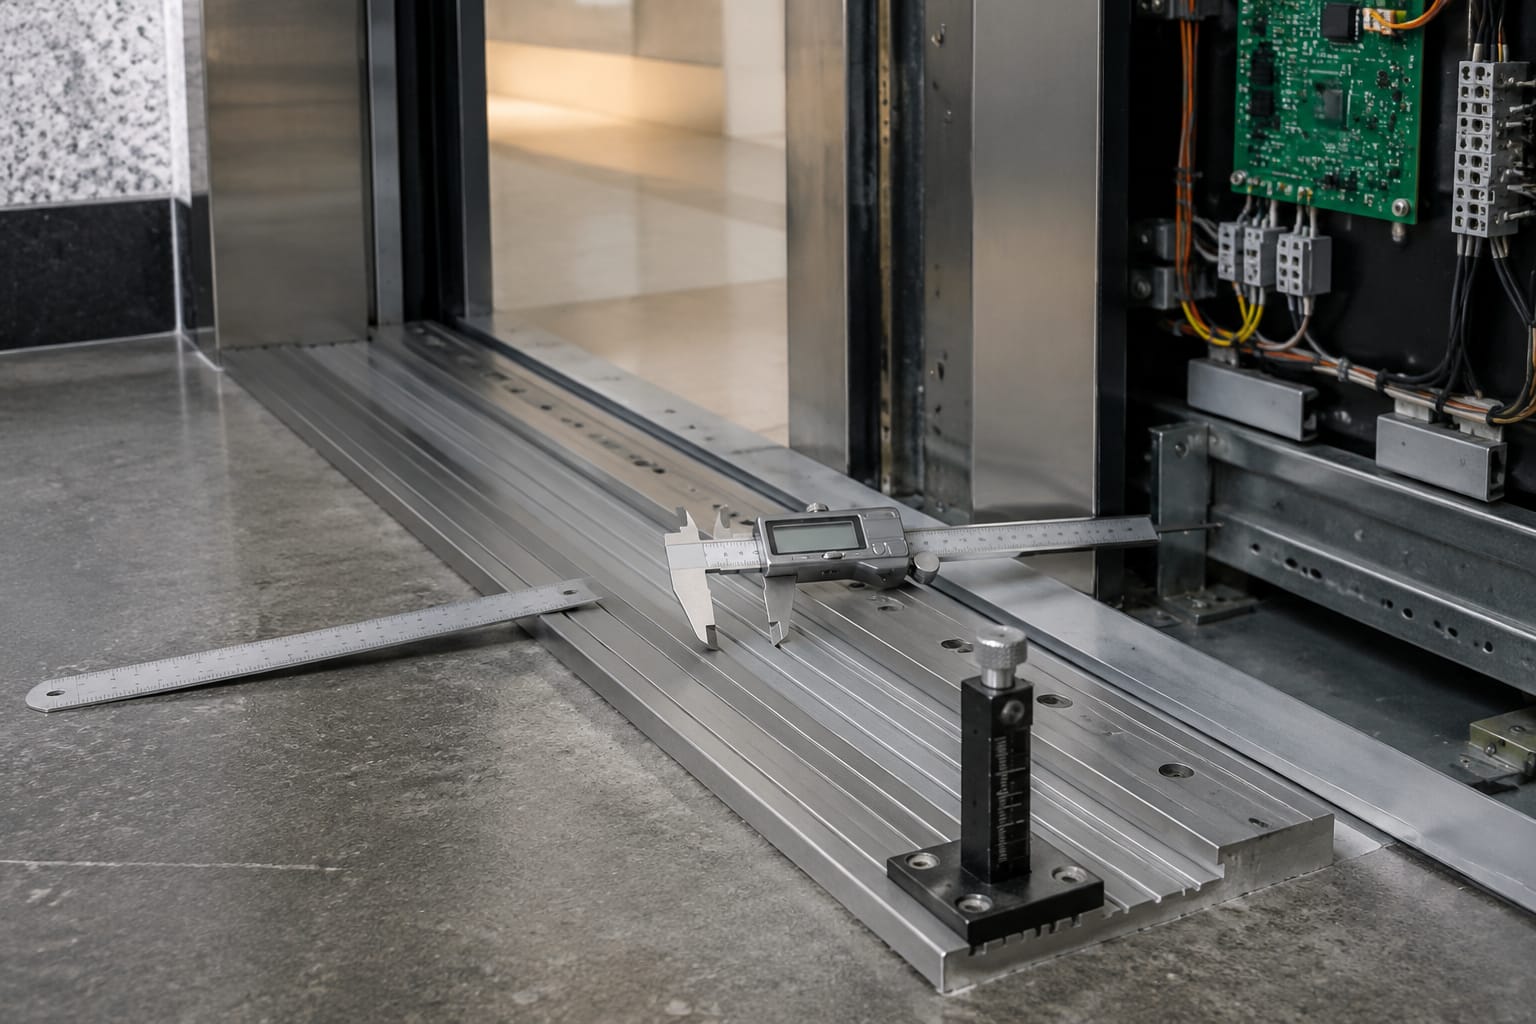
Sill profiles vary by the number, width, depth and spacing of their grooves. The groove is designed around the bottom guide used by that door system. A guide that is too wide can bind; one that is too narrow may allow excessive panel movement.
Common profile differences include:
- Single, two-track or multi-track layouts.
- Centre-opening, side-opening and telescopic-door configurations.
- Grooves at different offsets from the front edge.
- Flat, rebated or finished-floor interface details.
- Different mounting flanges, screw holes and countersink patterns.
- Profiles designed for distinct guide-shoe shapes.
Never rely only on a photograph, a broad profile label or a previous purchase description. A physical sample, technical drawing or accurate site measurements provides a much stronger basis for sourcing.
Signs of wear, damage and obstruction
A dirty groove can cause a door fault that appears electrical at first glance. Before adjusting interlocks, door operators or closing-force settings, inspect the sill and bottom guides. Mechanical resistance at the threshold can produce noisy travel, incomplete closing or repeated reopening.
Look for these conditions during planned maintenance or fault investigation:
- Sand, concrete dust, litter, screws, coins, cable ties or hardened deposits in the grooves.
- Door panels rubbing, shuddering or producing a scraping sound near the bottom.
- Excessive lateral movement of a panel when the door is stopped.
- Deep scores, dents, cracks, bent edges or distorted channels.
- A groove that has widened, become uneven or lost its original guide surface.
- Loose, missing, corroded or protruding fasteners.
- Sealant, tile adhesive, epoxy or floor-finishing material intruding into the track.
- Standing water, repeated wet cleaning residue or corrosion around the threshold.
- A height difference, lifted edge or damaged floor finish creating a trip concern.
- Bottom guides that are worn, split, loose or visibly misaligned.
A one-off obstruction may be corrected through cleaning and examination. Repeated debris accumulation can indicate a wider problem, such as a damaged sill edge, unsuitable cleaning practice, building works near the entrance or a poor transition between the floor finish and sill.
Do not simply grind down burrs or force panels through a damaged track without checking the original profile. Removing material may make the guide channel wider, alter the door position or introduce sharp edges. Major deformation, cracking, recurring guide wear or inability to restore smooth guided travel are stronger reasons to assess replacement.
Cleaning and inspection practices
Cleaning an elevator door sill is a controlled maintenance task, not merely a housekeeping activity. Preventing dirt from entering the hoistway and avoiding damage to door components are both important.
Only competent personnel should carry out work that requires access to door mechanisms, the car top, hoistway or electrical equipment. Follow the site’s lift isolation, access-control and maintenance procedures before working at an entrance.
A practical sill inspection routine
- Take the lift out of normal service where the inspection requires door-area access or hands near moving components.
- Open the relevant doors under controlled conditions and secure the work area.
- Vacuum loose debris from the sill grooves. A narrow nozzle is generally more effective than sweeping material toward the hoistway.
- Use a non-metallic pick or brush for compacted dirt where appropriate. Avoid tools that score the groove walls.
- Wipe accessible surfaces with a suitable, non-abrasive cleaner. Do not flood the sill or allow liquid to enter the hoistway.
- Check each groove through its full length for burrs, distortion, embedded material and rough sections.
- Inspect visible fasteners, sill edges, adjacent flooring and bottom guides.
- Operate the doors through several complete cycles and observe panel travel, guide engagement and closing behaviour.
The inspection interval should reflect traffic, environment and site conditions. Entrances exposed to construction dust, rain blown into open corridors, frequent trolley use or intensive public traffic often need more frequent attention than clean, low-traffic installations.
Avoid using heavy oils or grease in sill grooves unless the door-system manufacturer specifically calls for a product and method. Lubricant can hold grit in the track and turn ordinary debris into an abrasive paste. Likewise, do not use corrosive cleaners, strong acids or aggressive mechanical polishing without confirming they suit the sill material and surrounding finishes.
Record recurring locations and the type of debris found. This can help a contractor distinguish normal cleaning needs from a building-interface issue that requires action by the property manager or fit-out contractor.
Measure profile, width and fixing points
A replacement elevator door sill must be dimensionally and functionally compatible. Measuring only the exposed length is a common sourcing mistake. Collect enough information to identify the profile and to verify that the supplied part can be installed without unplanned drilling, cutting or changes to the door system.
Measurements to take before sourcing
Measure with calibrated tools where practical and record values in millimetres. Photograph the sill from above, from its end profile and around its fixing areas, including a scale reference.
| Item to confirm | Why it matters |
|---|---|
| Overall sill length | Determines whether the sill fits the entrance width and end details |
| Overall front-to-back width | Confirms fit with the threshold recess, floor finish and entrance structure |
| Total section height | Affects seating, finished-floor relationship and guide engagement |
| Number of grooves | Must suit the number and arrangement of door panels |
| Groove width and depth | Must match the bottom guide or gib geometry |
| Groove centre spacing and offset | Controls the panel travel path and clearances |
| End-profile shape | Identifies extrusion profile and side interface details |
| Fixing-hole quantity, diameter and centres | Confirms mounting compatibility and avoids site rework |
| Counterbore or countersink details | Prevents fasteners from protruding into the travel path |
| Existing door opening type and panel count | Confirms whether the sill suits centre-opening, side-opening or telescopic doors |
| Part number, manufacturer marking or drawing | Provides the most reliable starting point for identification |
Where the original sill is being removed, retain a labelled offcut or complete sample when possible. The cross-section is often the fastest way for a sourcing team to compare an offered part with the existing profile.
Also confirm whether the quoted dimension refers to the full extrusion, a groove spacing, a nominal door opening or a separate component designation. These references are not interchangeable.
Tolerances and field modification
Door guides operate with limited clearance, so a “close enough” profile can be unsuitable. Small differences in groove width or offset may cause binding, panel rattle or premature guide wear. Check the door manufacturer’s documentation and the actual guide dimensions when tolerance information is available.
Cutting a sill to length may be possible for certain profiles, but it should be planned rather than assumed. End finishing, holes, drainage considerations, frame interfaces and the remaining hole spacing can all be affected. Avoid drilling new fixing points into an unverified location where it could weaken a section or conflict with building reinforcement, threshold construction or door components.
Related door-panel alignment checks
A new sill will not correct every door problem. Before attributing a fault to the threshold, inspect the full panel guidance system. The door panel should remain properly supported from the overhead hanger while its bottom guide runs centrally and freely in the relevant sill groove.
Check the following items together:
- Condition and secure mounting of the bottom guides or gibs.
- Panel verticality and clearance from adjacent panels, jambs and sill edges.
- Hanger roller wear, bearings and adjustment.
- Hanger track condition and debris.
- Door clutch, vanes and landing-door coupling alignment where applicable.
- Door operator settings and closing-force behaviour, following the equipment manufacturer’s procedure.
- Door locks, interlocks and final closing position.
- Loose panel skins, damaged toe guards or bent lower panel sections.
When a panel drops slightly because of worn hanger rollers, its bottom guide can rub harder against the sill. Conversely, an excessively worn sill can allow lateral panel movement that affects door coupling and closing alignment. Diagnose the system as a whole before replacing individual parts.
For installations using compatible 1000-58 hanger-wheel arrangements, compare the existing parts against the applicable product details for a car door hanging panel with 1000-58 door hanging wheels or a landing door hanging panel with 1000-58 door hanging wheels. These references do not establish interchangeability by themselves; the panel design, wheel dimensions, door arrangement and original specifications still need verification.
A common mistake is to adjust the panel inward or outward merely to stop a scraping sound. That can shift the issue to another point in travel, affect clearances or interfere with locking. Find the actual source of contact first: sill groove, guide shoe, hanger, panel edge, floor finish or misaligned entrance.
Replacement and final door testing
Replace an elevator door sill when cleaning and minor approved rectification cannot restore reliable guide travel, or when the sill has damage that affects safety, fit or the door system’s intended operation. Typical triggers include severely deformed grooves, cracking, persistent guide binding, loose mounting that cannot be restored correctly, or a profile that no longer supports a compatible door arrangement.
A controlled replacement process should include:
- Verify the part profile, material, dimensions, panel configuration, fixing details and site interface before removal.
- Plan access, isolation and protection of the entrance, floor finish and hoistway opening.
- Remove the existing sill without damaging the surrounding frame, flooring or door components.
- Clean and inspect the mounting surface. Correct underlying movement, corrosion, damaged substrate or floor-interface problems before fitting the new sill.
- Install the sill level, securely fixed and aligned with the intended door travel path. Keep fastener heads clear of the guide channels.
- Refit or inspect bottom guides and confirm they enter the correct grooves without forcing.
- Adjust related door components only using the applicable manufacturer procedure and by competent personnel.
- Remove tools and debris from the entrance and hoistway area before returning the lift to service.
Final testing should cover more than one opening and closing cycle. Observe slow and normal operation, door reversal where applicable, complete closure, panel clearances, guide travel, landing engagement and unusual noise. Check every affected landing entrance when work changes a repeated landing-door component or a door-system setting.
Document the supplied sill profile, measurements, fitting date, observed condition of guides and hangers, adjustments made, and final test results. This record supports future fault diagnosis and gives purchasing teams a reliable reference for repeat orders.
For B2B sourcing, provide the supplier with the sill cross-section, measured drawing, clear photographs, panel arrangement, required quantity and any original part markings. Kelevator supplies multi-brand elevator spare parts to importers, distributors, maintenance contractors and OEM buyers; a complete technical enquiry helps establish whether the proposed sill matches the existing installation.
Related product references
For practical catalog examples related to this topic, review [Aluminum alloy door sill 60mm F type elevator parts](/products/aluminum-alloy-door-sill-60mm-f-type-elevator-parts/), [Car door hanging panel 1000 58 door hanging wheels lift accessories elevator spare parts](/products/car-door-hanging-panel-1000-58-door-hanging-wheels-lift-accessories-elevator-spare-parts/), and [Door hanging panel 1000 58 door hanging wheels lift accessories elevator spare parts](/products/door-hanging-panel-1000-58-door-hanging-wheels-lift-accessories-elevator-spare-parts/). Confirm the exact model, dimensions, ratings, and connectors before ordering.